Raspberry Pi Oled
Inspirado en este video decidi comprar una pequeña pantalla como la del video y ponerle a mi raspberry pi una pantalla igualmente, pero experimentando con mi raspberry tuve le que borrar la memoria muchas veces teniendo que repetir todo el proceso del video, para evitar esto escribi el siguiente script de bash que atomatiza la instalacion de las librerias y configura la Raspberry pi para solamente ejecutar el script de python y tener la pantalla funcionando
 !/bin/bash

sudo apt-get install -y python3 git python3-pip
echo #############python3, git and pyhton3-pip installed#############
sudo pip3 install --upgrade setuptools
echo #############python setuptools installed#############
cd ~
sudo raspi-config nonint do\_i2c 0
echo #############i2c enabled#############
sudo raspi-config nonint do\_spi 0
echo #############spi enabled#############
sudo raspi-config nonint do\_serial 0
echo #############serial comunication enabled#############
sudo raspi-config nonint do\_ssh 0
echo #############ssh enabled#############
sudo raspi-config nonint do\_camera 0
echo #############camera enabled#############
sudo raspi-config nonint disable\_raspi\_config\_at\_boot 0
echo #############raspi-init disabled at boot#############
sudo apt-get install -y i2c-tools libgpiod-dev
echo #############i2c-tools and libgiod-dev installed#############
pip3 install --upgrade RPi.GPIO
echo #############pip3 RPi.GPIO installed#############
pip3 install --upgrade adafruit-blinka
echo #############blinka installed#############
pip3 install adafruit-circuitpython-ssd1306
echo #############adafruit enabled#############
sudo apt-get install -y python3-pil
echo #############python-pil installed#############
Tambien modifique el codigo del video original pues no me gustaba que la pantalla se quedara prendida todo el tiempo, por lo que en mi codigo se apaga a los dos minutos, para cambier este tiempo solo hay que modificar la variable Tiempo
 # Created by: Michael Klements
# For Raspberry Pi Desktop Case with OLED Stats Display
# Base on Adafruit CircuitPython & SSD1306 Libraries
# Installation & Setup Instructions - https://www.the-diy-life.com/add-an-oled-stats-display-to-raspberry-pi-os-bullseye/
import time
import board
import busio
import digitalio

from PIL import Image, ImageDraw, ImageFont
import adafruit_ssd1306

import subprocess

# Time in minutes with the screen on
Tiempo=2

# Define the Reset Pin
oled_reset = digitalio.DigitalInOut(board.D4)

# Display Parameters
WIDTH = 128
HEIGHT = 64
BORDER = 5

# Use for I2C.
i2c = board.I2C()
oled = adafruit_ssd1306.SSD1306_I2C(WIDTH, HEIGHT, i2c, addr=0x3C, reset=oled_reset)

# Clear display.
oled.fill(0)
oled.show()

# Create blank image for drawing.
# Make sure to create image with mode '1' for 1-bit color.
image = Image.new("1", (oled.width, oled.height))

# Get drawing object to draw on image.
draw = ImageDraw.Draw(image)

# Draw a white background
draw.rectangle((0, 0, oled.width, oled.height), outline=255, fill=255)

font = ImageFont.truetype('PixelOperator.ttf', 16)
#font = ImageFont.load_default()
start=time.time()
while True:

 # Draw a black filled box to clear the image.
 draw.rectangle((0, 0, oled.width, oled.height), outline=0, fill=0)

 # Shell scripts for system monitoring from here : https://unix.stackexchange.com/questions/119126/command-to-display-memory-usage-disk-usage-and-cpu-load
 cmd = "hostname -I | cut -d\' \' -f1"
 IP = subprocess.check_output(cmd, shell = True )
 cmd = "top -bn1 | grep load | awk '{printf \"CPU: %.2f\", $(NF-2)}'"
 CPU = subprocess.check_output(cmd, shell = True )
 cmd = "free -m | awk 'NR==2{printf \"Mem: %s/%sMB %.2f%%\", $3,$2,$3\*100/$2 }'"
 MemUsage = subprocess.check_output(cmd, shell = True )
 cmd = "df -h | awk '$NF==\"/\"{printf \"Disk: %d/%dGB %s\", $3,$2,$5}'"
 Disk = subprocess.check_output(cmd, shell = True )
 cmd = "vcgencmd measure_temp |cut -f 2 -d '='"
 temp = subprocess.check_output(cmd, shell = True )

 # Pi Stats Display
 draw.text((0, 0), "IP: " + str(IP,'utf-8'), font=font, fill=255)
 draw.text((0, 16), str(CPU,'utf-8') + "%", font=font, fill=255)
 draw.text((80, 16), str(temp,'utf-8') , font=font, fill=255)
 draw.text((0, 32), str(MemUsage,'utf-8'), font=font, fill=255)
 draw.text((0, 48), str(Disk,'utf-8'), font=font, fill=255)

 # Display image
 oled.image(image)
 oled.show()
 time.sleep(.1)
 if ((time.time()-start)/60>Tiempo):
 oled.fill(0)
 oled.show()
# time.sleep(300)
 break
#oled.fill(0)
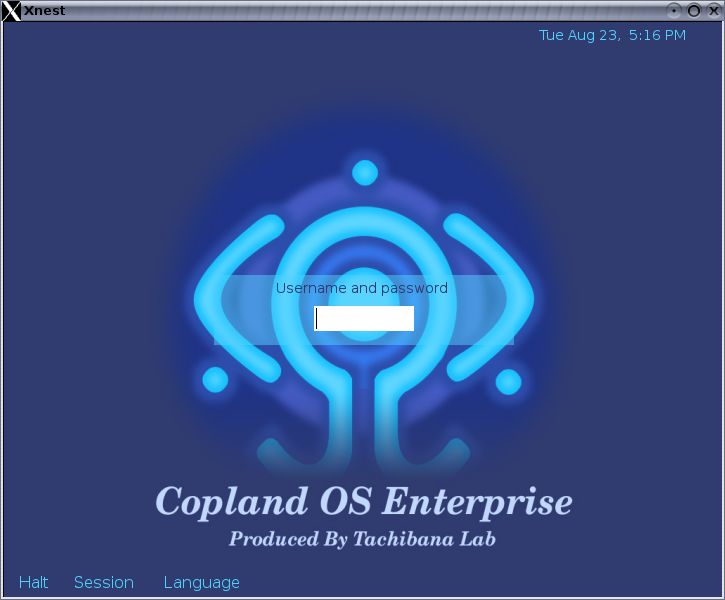
Para finalizar le quise poner a la pantalla el logo de Copland Os pues este script se ejecuta al prenderse y se veria como si la computadora fuera de esa marca, para eso cree una imagen en png de 128x64 para ajustarse a el tamaño de la pantalla oled, asi fue como quedo


Para mi caso opte por ponerle el texto de Copland Os en los primeros 16 pixeles pues en el modelo de la pantalla que ocupe los primeros 16 pixeles son de color amarillo, para esto solo tuve que convertir la imagen en formato ppm. Entonces para el codigo final solo le tuve que agregar la parte en negritas para que usara la imagen.
 Created by: Michael Klements
 # For Raspberry Pi Desktop Case with OLED Stats Display
 # Base on Adafruit CircuitPython & SSD1306 Libraries
 # Installation & Setup Instructions - https://www.the-diy-life.com/add-an-oled-stats-display-to-raspberry-pi-os-bullseye/
 import time
 import board
 import busio
 import digitalio

 from PIL import Image, ImageDraw, ImageFont
 import adafruit\_ssd1306

 import subprocess

 # Define the Reset Pin
 oled\_reset = digitalio.DigitalInOut(board.D4)

 # Display Parameters
 WIDTH = 128
 HEIGHT = 64
 BORDER = 5

 # Use for I2C.
 i2c = board.I2C()
 oled = adafruit\_ssd1306.SSD1306\_I2C(WIDTH, HEIGHT, i2c, addr=0x3C, reset=oled\_reset)

 **image= Image.open('lain.ppm').convert('1')
 oled.image(image)
 oled.show()
 time.sleep(4)
 oled.fill(0)
 oled.show()**
 # Clear display.
 oled.fill(0)
 oled.show()

 # Create blank image for drawing.
 # Make sure to create image with mode '1' for 1-bit color.
 image = Image.new("1", (oled.width, oled.height))

 # Get drawing object to draw on image.
 draw = ImageDraw.Draw(image)

 # Draw a white background
 draw.rectangle((0, 0, oled.width, oled.height), outline=255, fill=255)

 font = ImageFont.truetype('PixelOperator.ttf', 16)
 #font = ImageFont.load\_default()
 start=time.time()
 while True:

 # Draw a black filled box to clear the image.
 draw.rectangle((0, 0, oled.width, oled.height), outline=0, fill=0)

 # Shell scripts for system monitoring from here : https://unix.stackexchange.com/questions/119126/command-to-display-memory-usage-disk-usage-and-cpu-load
 cmd = "hostname -I | cut -d\' \' -f1"
 IP = subprocess.check\_output(cmd, shell = True )
 cmd = "top -bn1 | grep load | awk '{printf \"CPU: %.2f\", $(NF-2)}'"
 CPU = subprocess.check\_output(cmd, shell = True )
 cmd = "free -m | awk 'NR==2{printf \"Mem: %s/%sMB %.2f%%\", $3,$2,$3\*100/$2 }'"
 MemUsage = subprocess.check\_output(cmd, shell = True )
 cmd = "df -h | awk '$NF==\"/\"{printf \"Disk: %d/%dGB %s\", $3,$2,$5}'"
 Disk = subprocess.check\_output(cmd, shell = True )
 cmd = "vcgencmd measure\_temp |cut -f 2 -d '='"
 temp = subprocess.check\_output(cmd, shell = True )

 # Pi Stats Display
 draw.text((0, 0), "IP: " + str(IP,'utf-8'), font=font, fill=255)
 draw.text((0, 16), str(CPU,'utf-8') + "%", font=font, fill=255)
 draw.text((80, 16), str(temp,'utf-8') , font=font, fill=255)
 draw.text((0, 32), str(MemUsage,'utf-8'), font=font, fill=255)
 draw.text((0, 48), str(Disk,'utf-8'), font=font, fill=255)
 # Display image
 oled.image(image)
 oled.show()
 time.sleep(.1)
 if ((time.time()-start)/60>2):
 oled.fill(0)
 oled.show()
 # time.sleep(300)
 break
 #oled.fill(0)